• Skip to primary navigation
  • Skip to main content
  • Skip to footer
Ankeny Hill Farm

Ankeny Hill Farm

12 acres in Jefferson, Oregon. Grass fed beef, horse riding lessons and training, dairy goats, goat meat, chickens & exciting adventures!

  • Home
  • Adventures
  • Riding Lessons
    • Your First Horseback Riding Lesson: What to Expect
    • Essential Horseback Riding Gear for Beginners
  • Recipes
    • Home Canning
  • Shop
    • Oregon Grass Fed Beef
    • Oregon Pastured Chicken, Corn/Soy Free-Deposit
  • About Us
  • Privacy Policy

Uncategorized

Essential Horseback Riding Gear for Beginners

February 15, 2024 by admin Leave a Comment

If you are going to be taking riding lessons or just riding in general, I have created a list here to make it easy for you to see what horseback riding equipment you’ll need.

Note: I do have helmets for students to use if they aren’t ready to purchase one. The only thing you might need to purchase are riding boots if you don’t already have some.

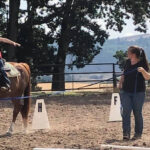
Horses are a lot of fun and I love, love, love to ride. However, they are large animals that can easily hurt us by accident. Wearing the proper attire and learning how to work with your horse in a safe manner can dramatically decrease your chances of getting hurt and ensure that you can enjoy your time with your horse. Please note, that accidents happen no matter how prepared we are, but we can do several things to help protect ourselves better.

Riding Helmet ASTM/SEI Approved

First of all, it is legal in Oregon to ride horses without a helmet. However, we require all riders under 18 to wear proper protective head gear while riding on the premises for your safety and for liability purposes. Programs such as 4-H have required 4-H members participating in any 4-H equestrian activity to wear proper helmets. (see their rules below, these are what we go by). Many other equestrian activities require helmets as well.

Troxel is a very popular brand that I have personally used.

Ovation Deluxe Schooler A bit more expensive but very comfortable and high quality.

You can also find excellent used helmets on Facebook Marketplace or at local tack sales

Effective January 1, 1996, all Oregon 4-H members participating in any 4-H equestrian activity, regardless of riding seat, will wear the minimum performance standards imposed by the American Society of Testing Materials (ASTM) F1163 and includes certification and labeling required by the Safety Equipment Institute (SEI). Such headgear will be secured with the harness engaged and be properly fastened when mounted on an equine or in a vehicle (cart, buggy, etc.) being pulled by one or more equine.

Oregon State University Extension Service

Riding Boots

Riding boots are another very important part of your horseback riding equipment/attire. They serve a certain amount of protection for your toes in case your foot happens to get in the way of your horses hoof. But more importantly riding boots are designed to lessen the chance of your foot getting caught in the stirrup and being dragged in the event of a fall.

Horse riding boots should

  • Have a smooth sole with no break from heel to toe so that there is nothing to catch on the stirrup.
  • No less than 1/2 inch heel, which serves to keep your foot from sliding through the stirrup and getting caught.
  • Light tread, again so the boot can slide easily out of the stirrup in case of a fall.
  • Fit the stirrups you are using. Again, your foot can get caught if the boot is too big for the stirrup. It is recommended to have a 1/2 inch gap between the stirrup and the widest part of the foot.

My Riding Boot Recommendations

A great quality leather riding boot can be expensive, however there are some excellent budget friendly boots out there. If you are just starting out, especially if you are buying for your child, I would definitely start with a lower cost boot. If buying for a child, they are going to outgrow their boots in no time so it’s best to get something low cost, just make sure the boots fit properly and are comfortable. There’s not much worse than wearing uncomfortable boots!

I’ll start with some budget friendly boots below, some I have tried and some I haven’t. Then I’ll list my favorite higher end riding boots.

Laced, Zipper or Pull on?

When shopping for riding boots, you’re going to come across all 3. Generally western boots and dressage boots are pull on, but you’ll find a range in between. Paddock boots tend to be zipper or laced. I personally like laced boots because I like to be able to adjust the tightness. My legs are also thicker and many of the zipper and pull on boots tend to be geared toward thinner legs/ankles. Every zipper boot I’ve tried would not zip up lol. So it’s laces for me, but even if I had thinner legs, I’d probably still prefer laces since I can adjust the tightness and comfort level. It all depends on your preference.

DREAM PAIRS Children’s Western Boot

I haven’t tried this brand personally but they are very affordable and have great reviews. Plus, if they don’t fit right, you can always return them.

Dublin Foundation Ladies Laced Paddock boots
I just bought a pair of these for myself in December 2023 and as of writing this article I’ve had them 3 months. So far they have been excellent and I wear them regularly when I do lessons and when I’m riding. They are very inexpensive at just around $45-$60 on sale at several stores online, and so far have held up just fine and are comfortable.

Ariat Paddock Boot
I also have a pair of Ariat paddock boots. These are more expensive but they are leather and once broke in, they are very comfortable. I’ve had mine for about 7 years now and they are still going strong even with getting wet and muddy at times (I do clean and condition them sometimes, though probably not as often as I should).

Filed Under: Uncategorized

Water Glassing Eggs with Pickling Lime

May 18, 2023 by admin Leave a Comment

Water Glassing Eggs

Today let’s talk about water glassing eggs. If you have your own chickens you’ve probably had the experience of an over abundance of eggs at some point followed by hardly any eggs (especially during winter). You’ve probably wondered how you can effectively preserve your abundance of eggs! I’ve had chickens for about 7 years now. I started out with a small flock, then grew it to about 300 at one point when I had my egg business. I now have a smaller flock again. (See why I quit the egg business)

Through all this, I wished I had a way to preserve fresh eggs to use when my hens were not laying as much. This past fall and winter, I actually had to go buy eggs at the store. I had downsized my flock a lot last year, down to about 50 hens and they all quit laying in the fall! I had zero eggs from them for about 6 months which hadn’t happened before. Yes there’s the theory that the government did something to the feed or that some big feed companies were skimping on the nutrition. It did make me wonder, but I tried changing feed a few times and adding some supplements but nothing seemed to help.

The Egg Conspiracy of 2022?

Here’s the thing… I normally had been changing out my flock every year so that I never had hens over 1.5 years old. They produce best between 6 months to around 1.5 so for an egg business, you want to keep higher production rates which means you bring in new chicks each year and get rid of the older ones once the newer ones start laying.

I didn’t change out my hens last year so they were pretty much all about 2 years old or older going into the fall. Plus I had cut my flock way down and production has always dropped a lot during the winter even when using lights.

Anyway, long story short, once the days started getting longer and warmer all of a sudden my girls started laying like crazy again. Im still using the feed I normally use so I don’t buy the whole feed conspiracy (not saying it wasn’t a possibility).

Lets Preserve All Those Eggs!

Now that I’m getting a ton of eggs again, I’ve decided to try a different way of preserving them. I’ve used the freezer method, but it’s just not the same as fresh whole eggs. Freezing takes a lot more work and I don’t like taking up space in the freezer if I don’t need to, along with having to thaw them.

I had heard about water glassing eggs a few years ago but for some reason I just didn’t try it out until now. It’s very simple to do and you can just set them in the pantry when done along with the rest of your canned goods. Apparently the pickling lime seals up the egg shell even more, basically making each egg air tight and able to last 12-18 months without going bad.

I will give a disclaimer. This is the first time I’ve water glassed eggs so I will be sure to give an update in a couple months when I use the first ones and then I’ll update you again in the winter so you can see the quality after a few months of being in the pickling lime.

Ingredients For Water Glassing Eggs

Pickling Lime

1/2 Gallon Mason Jars

Water

Fresh, clean eggs. Clean from the nest, not washed!

The Process of Water Glassing Eggs in Pickling Lime

You’ll want to collect your eggs and only use the ones that are clean. Do not wash them! Do not use eggs that have been refrigerated!

If you wash them, you will wash off the natural coating that is already there. They just need to be clean as in no poop or dirt. My cleanest eggs I find are the ones from the hens that always get out of the pasture and lay in the hay barn lol. I collected the cleanest ones and saved them on the counter until I had enough to use for water glassing. The dirty eggs I just leave on the counter and wash and use for cooking right away or put them in the fridge if I might not use them within a couple weeks or so.

Take your 1/2 gallon mason jar and set it on a kitchen scale and zero it out. Add one ounce of pickling lime, then pour 1 quart (4 cups) of water into the mason jar and stir. It will not dissolve all the way but that’s ok.

Next, start adding the fresh, clean eggs pointy side down (as much as possible). I used some tongs to set each egg gently down in the jar. A large pickle jar with a wider mouth would make this even easier! I’m going to use one of those next time! I’ve heard of people even using a 5 gallon bucket to water glass lots of eggs.

I was able to fit 13 or 14 eggs in each 1/2 gallon mason jar. Once all your eggs are added, just screw on the lid and set in a cool dark area of your pantry. In a box on the floor is a great place.

Now That We’ve Saved the Eggs…

When you use the eggs, you can just take what you need from the jar or container and close it back up with the leftover eggs in it. I’ve read that you need to wash the eggs thoroughly before using them as to get all the pickling lime off of them.

I will post updates on how my eggs are doing starting in a couple months so you can see the quality as they sit longer. From what I’ve read, the eggs are supposed to look and taste just like when they are fresh. I’m curious to see how they do being hard boiled as well.

Have you ever water glassed eggs? What’s your experience and do you have any tips? Leave a comment below!

Pin This!

Filed Under: Uncategorized

A New Chapter-Building An Equestrian Facility

February 15, 2022 by admin Leave a Comment

Hey there! Remember one of my first posts, when we first started our farm? Well, we are nearly 6 years into it since we moved here. Can you believe that? 6 years already! When we found this place, my plan/goal was to create a horse facility. I had one horse at the time, and I wanted to get back into giving riding lessons, plus work on furthering my own riding career specifically in natural horsemanship training and dressage.

Things haven’t quite gone exactly as I hoped and I’m not where I wanted to be by now. We’ve taken some detours trying to make money with the farm selling chicken eggs, grass fed beef and pastured organic whole chicken. Those things have helped some. It’s not a lot of money but it’s helped pay for a few things. Last year I was finally able to get my area for an arena cut out and sanded. We were also able to buy an old horse trailer that my dad has fixed up (it’s just waiting to get the floor put back in now).

3 summers ago I started giving some lessons to a friends children, but then broke my ankle late 2019 (not horse related) and had a long recovery period. Then with Covid shutdowns and quarantines I didn’t get to give any riding lessons in 2020. Last year, however, I got to add a couple more students over the spring through fall and I thoroughly enjoyed working with these kids! I feel like it’s baby steps, but things are moving in that direction.

The problem with only having an outdoor arena, especially here in Oregon, is that you really can’t do much riding during the rainy season. So pretty much October through April or May I have to shut down the riding lessons. That makes it difficult to gain and keep students. Plus I can’t really do any of my own riding for nearly half the year. I could haul somewhere to ride but we just got our horse trailer last year and it’s not quite finished being renovated yet. It is also very difficult to find a stable that will allow you to give lessons using their facilities. Not to mention they are going to charge quite a bit to basically rent the arena, and it costs money in gas to haul my horse there if the student is using my horse.

So this year we found out that we can refinance the mortgage and get enough cash out to at least pay for materials for a 60x120ft roof only arena. We received one quote on materials so far and I have to say, it was a bit of a shock. I realized that the price of lumber is still up right now but the material quote for just a roof only, no sides enclosed at all is $51,000. Yikes. We are able to get a little over that with the refinance, but we had some other things we were hoping to do with part of the money too like adding a master bedroom to our 2 bedroom house so that the 2 boys that are still in the house don’t have to share a room anymore and we can actually have a comfortable master bedroom. We have 3 boys and none of them have really ever had their own room except our oldest for a short time in our old house.

So, we will be able to get just enough money to buy the materials for the arena and then we have some friends/family that know what they are doing and can help build it, but we do need to make sure we have enough to pay for the help.

Filed Under: Uncategorized

Do What You Have to Do…

November 30, 2021 by admin Leave a Comment

Until you can do what you want to do….

Went for a walk in the field behind our property the other day. My youngest boy who is 12, is very into making Youtube videos so he wanted to do a trash finding video. I didn’t want him going out there alone plus he needed to use my phone for the video, so I reluctantly tagged along. Isn’t that just mom life? lol I never seem to have anything of my own that I’m not sharing with my kids or my husband. Maybe I say yes too often…I don’t know. But I do want to encourage his love for videography.

Anyway…I currently have so much on my mind and I feel like I have to make it all happen somehow. Anyone else have a million things you want to do and you can’t give up any one thing? (Not can’t, but don’t want to) sigh…

I feel the pressure to make extra money so we can get more done and keep the place up. The farm income is slowly growing, but we really need it to grow a little faster and there are things that need fixing. I decided a couple weeks ago to put in an application at Hobby Lobby. Now that all 3 boys are pretty much teens (my youngest is 12), I don’t feel so much like I need to be here to watch them. My youngest still home schools but i would only be working part time so we can still make that work. However, I worry about how I’ll do with everything else. The boys can help out but there are the egg sales, custom ornaments I need to get done, giving riding lessons on dry days, milking and other animal care, making meals and then once kids sports start back up again since they are taking the winter off. And then just the general concern of everyone’s well being in our home and everything that goes along with having 5 different personalities and ages under one roof.

Anyway… I really wish I didn’t need to get an outside job but I guess you do what you have to do for awhile.

Funny thing is, I keep thinking, you know what? Let’s say I start working part time away from home, for someone else. That’s probably 20-25 hours per week. What if I were to do that at home focusing on one or 2 things? I am always trying to do too many things at once and it’s really hard to get something going really well if I’m only spending a small amount of time and focus because I’m trying to spread myself too thin.

I also may need to go back in to surgery for my ankle that I broke in October 2019. It was doing really well until this summer and then I started having some new pain. Not horrible and I can still do my stuff, but it has started happening more often and it’s annoying. I’m thinking I may have to have the pins taken out or fixed or something. I had broken a couple pins early on during my recovery but the doctor said as long as it wasn’t bothering me, they’d just leave them alone. So, this month I go in for an xray and we’ll see if I need surgery.

If I do need surgery, then I’m not going to be able to have an outside job for awhile anyway. Oh well, I guess it’s in the Lord’s hands. I figure while I’m waiting for Hobby Lobby to call me, if they do, I’m going to push myself to focus on one or two areas of the farm and really try and grow. One of those areas I’ve decided is posting to Instagram every day for awhile and getting more content up here on the website.

Laser focus is what I need, but as a wife and mom, it can be so hard. I see others do it though so I know it can be done!

Filed Under: Farm Adventures, Uncategorized

Pumpkin Spice Frappuccino Recipe

October 16, 2018 by admin Leave a Comment

Pumpkin Spice Frappuccino Low Carb Keto Friendly

We’ve got some nice pumpkins out in our little pumpkin patch this year, and I decided it would be good to make some pumpkin puree and freeze it. I first made a Pumpkin Spice Latte and it was delicious! For those of you that are hot coffee drinkers, you can find the pumpkin spice latte recipe here on my Home Coffee Recipes website. So today I decided to try a pumpkin spice frappuccino. (I actually forgot to put the pumpkin spice in and it still tasted delicious, but I’ve added it to the recipe)

I didn’t follow any specific recipe, I just made my own concoction and dumped it all in lol I’ve been making flavored coffee drinks at home for years, so I’ve gotten pretty good at getting the amounts right for the right flavor.

Let me tell you, I wasn’t quite sure how this was going to turn out though. I decided at the last minute to try the new Monk Fruit sweetener I bought off Amazon. I’ve used it in a few things now and I really like it, but I wasn’t sure how it would taste with the pumpkin spice frappuccino.Β  It was perfect! I did go a little on the heavy side, 1/4 cup, but It seems you need to use more of this sweetener to get it sweet enough. Thankfully it is calorie free! 1/4 cup of the Monk Fruit sweetener was perfect for my taste though.

Ok, so let’s get this pumpkin spice frappuccino party started!

Pumpkin Spice Frappuccino Recipe

First, here are the ingredients…

  • 1/4 cup coffee
  • 1.5 cups ice
  • 1/4 cup Monk Fruit Sweetener
  • 1 Cup pumpkin puree
  • 1/2 cup heavy whipping cream
  • 1/2 tsp Vanilla (I used Danncy Vanilla that my mom brought home from Mexico. They have it here on Amazon: Danncy Vanilla)
  • 1 tsp Pumpkin Pie Spice
Pumpkin Spice Frappuccino Ingredients-Low Carb Keto

Add 1.5 cups of ice or just fill a 20oz glass a bit less than full. Then 1 cup of pumpkin puree.

Pumpkin Frappuccino Step 1-Add ice and pumpkin puree

Next add 1/2 cup heavy whipping cream

Pumpkin Frappuccino Step 2 add heavy whipping cream

Then add 1/4 cup coffee, 1/2 tsp of vanilla and 1/4 cup of Monk Fruit Sweetener. You can also add 1 tsp of pumpkin pie spice here as well. I forgot to add it in mine but it would have been even more amazing if I had!

Pumpkin Frappuccino step 3 add vanilla and monk fruit sweetener

Now it’s time to blend! Blend the frappuccino for about 30 seconds, making sure it’s nice and smooth. A lot of people don’t blend their frappuccino’s very well and end up with little chunks of ice. Of course, if you like the chunks of ice then blend for less time πŸ˜‰

If you don’t have a good blender, I recommend Oster for a really good, affordable blender. I love mine!

Blend pumpkin spice frappuccino

After it’s blended nice and smooth and creamy, pour that delicious goodness into a glass…..

Pour Pumpkin Spice Latte into glass

Add some whipped cream and sprinkle some pumpkin pie spice on top (nutmeg or cinnamon will do if you don’t have pumpkin pie spice) and enjoy!! Of course you can leave out the whipped cream if you don’t want the extra sugar.

Pumpkin Spice Frappuccino Low Carb Keto Friendly

I love this recipe and I was surprised at how good it tasted even though I left out the real sugar and made it low carb/keto friendly. I’m not on the keto diet and don’t plan to be, but I’m all for replacing some things with a low carb version and using less added sugar. This turned out super yummy without regular sugar so I’ll definitely be making it like this again!

Pumpkin Spice Frappuccino Low Carb Keto Friendly
Print
Pumpkin Spice Frappuccino
Prep Time
2 mins
Cook Time
2 mins
Total Time
4 mins
 

A delicious pumpkin spice frappuccino that is easy to make AND low carb/keto friendly!

Course: Dessert, Drinks
Cuisine: American
Keyword: coffee, frappuccino, latte, pumpkin, pumpkin spice
Ingredients
  • 1/4 cup coffee or 2-3 shots espresso. Best if it’s cooled some so it doesn’t melt the ice too much
  • 1 2/3 cups ice cubes
  • 1/2 cup heavy whipping cream could use half & half or even low fat milk if you want less fat. I can’t gurantee it’ll still taste great though πŸ˜‰
  • 1 cup pumpkin puree
  • 1/2 tsp vanilla
  • 1 tsp pumpkin pie spice optional
  • 1/4 cup Monk Fruit Sweetener or sweetener of your choice. If you don’t have or don’t like sweetener, by all means, use regular sugar!
Instructions
  1. Add all ingredients to a blender and blend for 30 seconds. Pour in a glass, top with whipped cream if desired and sprinkle with pumpkin pie spice. ENJOY!

Buy Some of the Ingredients Now…

Filed Under: Recipes, Uncategorized

DIY Bread and Butter Pickles-Canned or Refrigerator

September 27, 2018 by admin Leave a Comment

Bread and Butter Pickles Recipe

I’ve always loved bread and butter pickles. They are my favorite pickles, especially for putting on hamburgers. This is our 3rd summer here on the farm, and the first time doing some canning. My mom bought a water bath canner last month, so we’ve been canning pickles galore! We have quite a few dill pickles canned since those are the simplest, but I’ve also been mixing in some bread and butter pickles as well.

To tell you the truth, I am not a huge pickle fan, aside from bread and butter pickles. I’ll eat them, but they aren’t on the top of my list unless on a hamburger or sandwich lol. However, since we have so many pickles now, I am going to be eating them more! They are healthy, so there’s that!

Bread and butter pickles take a little more time than regular dill, but they are so worth it and sooooo delicious. The cool thing about pickles is that you can make them for the refrigerator too so you don’t have to bother with canning if you only want smaller batches. This goes for bread and butter pickles as well!

If you don’t want to can these pickles, you can just do the recipe as stated, but leave out the water bath part. Just put them in jars with lids, let them cool on the counter and then stick them in the refrigerator. Let them sit in the refrigerator for at least a couple days or so before eating them for the best flavor.

Let’s get started!

First you’ll need to get your cucumbers sliced up. About 6lbs of cucumbers should fill 4 quart jars. Slice up about 4 medium onions as well.

Slice Cucumbers

Mix together the onions and sliced cucumbers in a large bowl or pan. Pour 1/2 cup pickling salt over the cucumbers and onions and carefully mix so that everything is covered in the salt. (I use sea salt, but you can also use Kosher salt. Do not use regular table salt because the additives in it will turn the pickles a dark color)

Now you’ll need to cover the pickle/onion mixture with a clean towel and put ice all on the top of it and let it chill in the refrigerator for 4 hours. This will help keep the pickles crisp (so I’ve read, I’m not entirely convinced about this part!) Make sure to not let the towel drape over the sides of the pan because when the ice starts melting, it will soak up the water and drip all over your refrigerator…. Ask me how I know! lol

Put Ice on cucumbers to chill

When the 4 hours is up, put the cucumber and onion mixture in a colander and rinse well. Let it sit to drain and then rinse again and let sit to drain again while you prepare the canner and jars.

Rinse cucumber and onion slices

Now, get your canning jars washed and sterilized. You can do this by running them through the dishwasher, or you can wash them and then set them with some water in the canner and boil for a few minutes. I sterilize mine in the canner. This is also good so that when you are ready to pack the jars with the pickles, the jars will be nice and warm already.

Sterlize Canning Jars in Boiling Water
Sterilize your jars in the water bath canner and boil for about 5 min. Then turn the heat down and let them sit in the hot water until you are ready to pack the jars with pickles. See that green jar grabber? That is a must to have and you can get one here: Jar Grabber (Amazon.com link)

So of course, in order to sterilize the jars in the water bath canner, you’ll need to get that thing filled with water about 3/4 full. Set it on the burner on high and put the lid on. You’ll want to get the canner going just before, or as soon as you take the cucumbers out of the refrigerator because it will take quite awhile to get to boiling.

You’ll also want to sterilize the lids and rings at this time. Just stick them in a pot of water and bring to a boil. Then I just turn the burner off and let them sit there until I’m ready to use them.

Sanitize Canning Lids in Boiling Water

Once you’ve set the canning jars in the boiling water to sterilize, you’ll want to get the brine ready. Use a 4 quart pot and pour in 2 1/2 cups of white distilled vinegar

White vinegar for pickle brine

2 cups of Apple Cider Vinegar

Apple cider vinegar for pickle brine

Add 4 1/2 cups sugar. I know, it seems like a lot, but bread and butter pickles are sweet! This is basically making a thin syrup and it’s so yummy!

Sugar for bread and butter pickle brine

Next add 2tbsp mustard seeds…. I don’t understand why the store doesn’t sell mustard seeds in a bigger container! Look at that…. It’s tiny πŸ™ I think I may try growing my own mustard seeds next year.

McCormick Yellow Mustard Seed
Add Yellow Mustard Seed to Pickle Brine

2 teaspoons of crushed red pepper. You can add less if you like, but I find this amount is just right to give it that tang. I don’t like very spicy foods, and this does not make the pickles too spicy, just tangy.

Add the crushed red pepper to the pickle brine

1 1/2 teaspoons of celery seeds

Add celery seeds to pickle brine

Cut two 1 inch pieces of a cinnamon stick and add that to your brine. That’s about 2/3 of a whole cinnamon stick

 An inch of cinnamon stick for pickle brine

I just LOVE these colors!

Add 2/3 Cinnamon Stick to Pickle Brine

Next add 12 allspice berries and about 1/4 teaspoon of ground allspice

Add 12 allspice berries to pickle brine

Add 12 whole cloves plus 1/4 teaspoon of ground cloves

Add 12 Whole cloves to pickle brine

And last, but not least, add 1 teaspoon of Turmeric

Add Turmeric to Pickle Brine

Doesn’t it just look beautiful? I love the colors and the smell! It smells like Christmas πŸ˜‰

Bread and Butter Pickle Brine

Bring this brine/syrup to a boil and then add your pickle and onion mixture to the hot brine. Bring it back to a boil and then turn off the heat.

Add cucumbers and onions to brine

Take your jars out of the canner with the
Jar Grabber (Amazon.com link) , dumping the hot water back into the canner and set them on a towel on the counter.

Use a slotted spoon and fill the jars with the hot cucumbers and onions to about 1 inch from the top of the jars.

Fill canning jars with pickles
Filled pickle jars

Once the jars are filled, pour the pickle brine/syrup into each jar about 1/2 inch from the top of the jars. I like to take the cinnamon sticks out and let them cool a minute and then cut them up and stick a piece of cinnamon stick in each jar as well.

Use a butter knife to stick down the sides of the jars. Carefully use an up and down motion, going around each side of the jar to get the air bubbles out. If there’s any extra brine left, you might top off the jars if they sank down some after getting the air bubbles out.

Now that the jars are all filled with the pickles and brine, wipe the tops of the jars with a clean damp cloth or paper towel and put the lids and rings on and place them in the boiling water bath canner.

Make sure the water covers the tops of the jars at least an inch (that is the current recommendation). Bring the water back to a boil and let boil for 15min. or longer depending on your altitude.

Put bread and butter pickle jars in water bath canner

When the pickles are done processing, pull them out with your jar lifter and set them on a dish towel on the counter to cool, making sure they don’t touch each other. You should hear the beautiful sound of lids popping shortly as they seal. After the jars are cooled, you can check that they’ve sealed by pressing down on each lid. If a lid pops back up, then it is not sealed and you’ll want to put that jar into the refrigerator.

Canned Bread and Butter Pickles

I hope you give this bread and butter pickle recipe a try. It is delicious! You’ll want to let the pickles set for about a month before opening them, so I’ve heard, for best flavor.


Bread and Butter Pickles Recipe
Print
Canned Bread and Butter Pickles
Prep Time
30 mins
Cook Time
15 mins
Chill time
4 hrs
Total Time
45 mins
 
Course: Appetizer
Cuisine: American
Keyword: bread and butter pickle recipe, bread and butter pickles, can your own pickles, canned pickles, diy pickles, home canned pickles, pickles
Servings: 4 Quarts
Author: Melissa Hall
Ingredients
  • 4 jars Quart canning jars Wide mouth jars are best, but narrow mouth will do.
  • 1 16 quart canning pot with rack
  • 1 Jar lifter
  • 6 lbs Cucumbers
  • 2 lbs Medium white or yellow onions
  • 1/2 cup pickling salt Can use sea salt or kosher salt, but NOT regular table salt
  • 2 1/2 cups distilled white vinigar (5% acidity)
  • 2 cups Apple cider vinegar (5% acidity)
  • 4 1/2 cups sugar
  • 2 tbsp mustard seeds
  • 2 tsp crushed red pepper
  • 1 1/2 tsp celery seeds
  • 2 inch of a cinnamon stick
  • 12 Allspice berries
  • 1/4 tsp ground allspice
  • 12 whole cloves
  • 1/4 tsp ground cloves
  • 1 tsp turmeric
Instructions
  1. Slice cucumbers in 1/4 inch slices. Slice onions thinly and place cucumbers, salt and onions in a large bowl or pan and mix carefully.

  2. Place a clean towel on top of the cucumber mixture, cover with ice and place in the refrigerator to chill for 4 hours

  3. When cucumber mixture is almost done chilling, prepare the canner by filling 3/4 full with water and set on the stove on high. This will take some time to get to boiling. In the mean time, be sure your jars are washed.

  4. Place rings and lids in a small pot of water and bring to a boil. Turn off the heat and let sit in the hot water until you are ready to use them.

  5. After the 4 hours is up, put the cucumber mixture into a colander and rinse well. Let drain and then rinse again. Let drain.

  6. When the canner pot is boiling, fill the clean jars with some of the hot water from the canner and let sit in the canner for 5 minutes.

  7. While the jars are sterilizing, you can prepare the pickle brine. Add the vinegar, sugar and all spices to a 6-8 quart pot and place on the stove on high. Once it begins boiling, add the pickle and onion mixture. Stir. Bring back to a boil and then turn off the heat.

  8. Take out your canning jars using the jar lifter and dump the hot water back into the canner pot.

  9. Using a slotted spoon, fill the hot jars with pickle/onion mixture. Fill to 1 inch from the top of the jars. Then fill the jars to 1/2 inch from the top with the brine/syrup.

  10. After the jars are filled, use a butter knife to slide down the sides of the jars in an up and down motion to help get the air pockets out.

  11. Wipe the tops of the jars with a clean, damp cloth or paper towel and place the lids and tighten the rings.

  12. Using the jar lifter, place the jars in the water bath canner making sure the water is 1 inch above the tops of the jars. Add more HOT water if needed and replace the lid. Bring the canner to a boil and let boil for 15 min. (may need to boil longer depending on your elevation)

  13. Remove the pickle jars from the canner and set on a towel on the counter, making sure there is space between them. Let cool. You should hear popping sounds within 10min. or so letting you know the lids are sealing. Once the jars are cool, check each lid by pressing down on the tops. If they pop back up then they are not sealed and you’ll need to put the jar in the refrigerator.

Filed Under: Canning Vegetables, Home Canning, Uncategorized Tagged With: cucumbers, pickles

Footer

Your First Horseback Riding Lesson: What to Expect

Snickerdoodle Frappuccino Recipe

Snickerdoodle Frappuccino -Blended Coffee

Bread and Butter Pickles Recipe

DIY Bread and Butter Pickles-Canned or Refrigerator

Copyright © 2026 · Genesis Sample On Genesis Framework · WordPress · Log in